


Warning: Undefined array key 4 in /home/a1ndt/public_html/wp-content/plugins/best-local-seo-tools/localseoportfolio-free.php on line 1366
Warning: Undefined array key 4 in /home/a1ndt/public_html/wp-content/plugins/best-local-seo-tools/localseoportfolio-free.php on line 1516
Warning: Undefined array key "HTTP_REFERER" in /home/a1ndt/public_html/wp-content/plugins/best-local-seo-tools/localseoportfolio-free.php on line 1826
Deprecated: strstr(): Passing null to parameter #1 ($haystack) of type string is deprecated in /home/a1ndt/public_html/wp-content/plugins/best-local-seo-tools/localseoportfolio-free.php on line 1826
Warning: Undefined array key "HTTP_REFERER" in /home/a1ndt/public_html/wp-content/plugins/best-local-seo-tools/localseoportfolio-free.php on line 1890
Deprecated: strstr(): Passing null to parameter #1 ($haystack) of type string is deprecated in /home/a1ndt/public_html/wp-content/plugins/best-local-seo-tools/localseoportfolio-free.php on line 1890
Warning: Undefined array key "description2" in /home/a1ndt/public_html/wp-content/plugins/best-local-seo-tools/localseoportfolio-free.php on line 1893
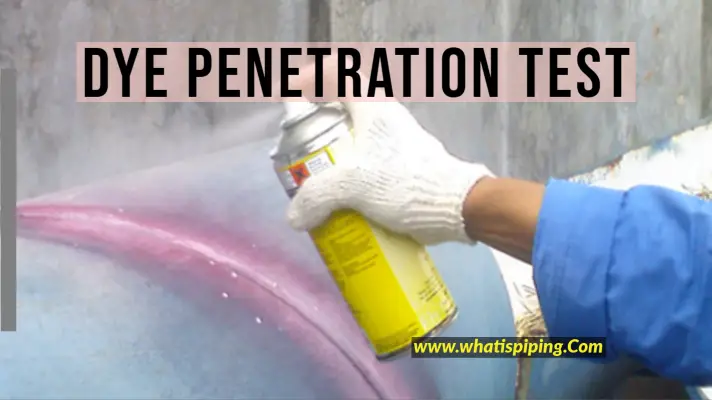
Dye Penetration Test (DPT) is one of the simplest and oldest Non-Destructive Inspection methods. Also, known as the Liquid penetration test, the Dye penetrant test is widely used to detect surface discontinuities like cracks, fractures, porosity, grinding defects, incomplete fusion, and flaws in joints. This test or inspection method is serving as an aid in finding irregularities in aluminum, cast iron, brass, steel and stainless steel, copper, magnesium, carbides, stellite, ceramics, and even certain plastic materials. So, the dye penetration test is suitable for both ferrous and non-ferrous materials and is highly economical as compared to the other non-destructive inspection methods.
Principles of Dye Penetration Test
The Dye Penetration test works on the philosophy of capillary action. A liquid with low surface tension can penetrate into a clean and dry surface if the liquid is kept for a certain time called “Dwell Time”.
Liquid Penetrant has to be applied over the test specimen/object by dipping, spraying or brushing. The excess amount has to be removed after the dwell time is over. A developer is applied sometimes. The main function of the developer is to draw the penetrant out of the flaw making an invisible indication, visible to the inspector. Depending on the type of dye used, the dye penetration inspection is performed under white or ultraviolet light.
Dye Penetration Test Procedure Steps
Depending on the penetrant system, component size, and discontinuity type, the procedure of the dye penetration test may vary. But, their general steps will be similar and can be presented as follows:
Pre-cleaning and Surface Preparation:
This is the most important and basic step. The examining surface is cleaned from grease, oil, water, paint, or any other contaminants. The penetrant must be able to freely enter the discontinuities. Cleaning methods may include solvents, alkaline cleaning steps, media blasting, etc. Sometimes, the sample may even require etching to make the defects open to the surface, dry, and free of contamination.
Penetrant Application:
Next, The liquid penetrant is applied on the specimen surface and allowed to soak into any flaws for its dwell time (generally 10 to 60 minutes). The dwell time varies depending on the used penetrant (viscosity: longer duration for high viscosity), test material, and defect sizes (smaller flaw sizes require longer penetration time). Dwell time is normally provided by the penetrant manufacturers and depends on the following:
- the surface tension, contact angle, dynamic viscosity, specific gravity, and microstructural properties of the penetrant.
- the atmospheric and capillary pressure of the defect opening.
- the pressure of the entrapped gas in the flaw by the penetrant.
- the radius of the defect.
Excess Penetrant Removal:
The excess penetrant needs to be removed from the sample surface. Depending on the dye penetrant type, The removal method is selected from water-washable, solvent-removable, lipophilic post-emulsifiable, hydrophilic post-emulsifiable, etc. Emulsifiers are used for the highest sensitivity level, and it chemically reacts with the oily penetrant, thus making it easier to remove using water spray. The excess penetrant has to be removed thoroughly otherwise, on the application of the developer, it may leave a background in the developed area that can mask indications or defects. Also, while using solvent remover and lint-free cloth, care must be exercised not to spray the solvent on the test surface directly, because this can remove the penetrant from the flaws.
Fig. 1: Dye Penetration Test procedure
Developer Application:
A thin layer of white developer is applied after the excess penetrant has been removed. Various types of developers are available like a non-aqueous wet developer, dry powder, water suspendable, and water-soluble. Based on the compatibility of the penetrant, the developer is selected. The developer basically draws back the dye penetrant from the defects to the surface so that those can be visible. This process is known as bleeding out. Developers are applied by dusting, spraying, or dipping.
The developer is kept on the test surface for sufficient time to extract the trapped penetrant out for visible indication. The minimum development time is usually 10 mins. The bleed-out easily indicates the location, type, and orientation of the flaw in the specimen.
Developers are available in the following six standard forms:
- Form a-Dry Powder
- Form b-Water Soluble
- Form c-Water Suspendable
- Form d-Non-aqueous Type 1: Fluorescent
- Form d-Non-aqueous Type 2: Visible Dye and
- Form f-Special Applications.
Inspection:
Inspection is performed in the next step using adequate light. Inspection is done using visible light for visible dye penetrant and ultraviolet (UV-A) radiation of adequate intensity for fluorescent penetrant examinations. To understand the proper characteristics of the defects the inspector must be experienced enough.
Post-Cleaning:
The final step is to thoroughly clean the surface after inspection and recording of defects. The applied developer is removed.
Dye Penetration Test Standard
The following dye penetrant test standards provide guidelines for the test:
- ISO 3452-1, 2, 3, 4, 5, & 6: Non-destructive testing – Penetrant testing.
- ISO 3059, Non-destructive testing – Penetrant testing.
- ISO 12706, Non-destructive testing – Penetrant testing – Vocabulary
- ISO 23277, Non-destructive testing of welds – Penetrant testing of welds – Acceptance levels
- EUROPEAN COMMITTEE FOR STANDARDIZATION (CEN)
- EN 1371-1 & 2 Founding – Liquid penetrant inspection
- EN 10228-2, Non-destructive testing of steel forgings – Part 2: Penetrant testing
- EN 10246-11, Non-destructive testing of steel tubes – Part 11: Liquid penetrant testing of seamless and welded steel tubes for the detection of surface imperfections
- ASTM E 165, Standard Practice for Liquid Penetrant Examination for General Industry
- ASTM E 1417, Standard Practice for Liquid Penetrant Testing
- ASME Boiler and Pressure Vessel Code, Section V, Art. 6, Liquid Penetrant Examination
- ASME Boiler and Pressure Vessel Code, Section V, Art. 24 Standard Test Method for Liquid Penetrant Examination SE-165 (identical with ASTM E-165)
Dye Penetration Test Kit
The dye penetration test kit contains all the required elements for performing a dye penetration test. These kits are easily available in the market and contain the Penetrant, Cleaner, and Developer as shown in Fig. 2 below.
Fig. 2: Typical Dye Penetrant Test Kit
Penetrant characteristics in Dye Penetrant Test
Depending on the sensitivity level required, the penetrants of the dye penetration test should possess various important properties like:
- Should be highly visible for producing indications.
- Must flow easily over the test specimen surface.
- Should be drawn easily into the defects by capillary action.
- Must not be harmful.
- Should be easily drawn back using the developer.
Penetrant types in Dye Penetration Test
Depending on the physical characteristics and performance of the penetrant materials, they are of two basic types:
- Type 1-Fluorescent Penetrants containing dyes that fluoresce under ultraviolet radiation and
- Type 2-Visible Penetrants containing red color dye.
Based on the penetrant removal methods, dye penetrants are classified as follows:
- Method A-Water Washable.
- Method B-Post Emulsifiable, Lipophilic.
- Method C-Solvent removable, and
- Method D-Post-Emulsifiable, Hydrophilic.
Again, depending on the detectability of defect indication, five types of dye penetrant is available:
- Level 1/2-Ultra Low Sensitivity
- Level 1-Low Sensitivity
- Level 2-Medium Sensitivity
- Level 3-High Sensitivity and
- Level 4-Ultra-High Sensitivity
Acceptance criteria for Dye Penetrant Test
Mandatory Appendix 8 of ASME BPVC Section VIII Div 1 provides guidance regarding the acceptance criteria for the Dye Penetrant test. As per the above standard, All surfaces to be examined shall be free from:
- Any relevant linear indications.
- Relevant round indications with dimensions > 3/16″ (4.8mm).
- Four or more relevant round indications in a line separated by 1/16″ (1.6mm).
Here,
- Relevant Indications: All Indications with major dimensions greater than 1.5 mm (1/16 in.) shall be considered relevant.
- Linear Indication: Any indication with a length greater than three times the width.
- Rounded Indication: Any indication with a length equal to or less than three times the width. A rounded indication may be of circular or elliptical shape.
Advantages of Dye Penetration Test
The main advantages of a dye penetration test are:
- small defects can be detected easily.
- suitable for a range of materials.
- Inspection is quick and can easily cover large areas and volumes.
- inspection of complex shapes can be performed easily.
- Indications on the surface constitute a visual representation of the flaw and so an idea about the actual defect is obtained.
- Portable and easily available.
- materials and associated equipment for the dye penetrant test are relatively inexpensive.
Disadvantages of Dye Penetration Test
However, there are a few drawbacks of the dye penetration test as follows:
- Limited to the only surface-breaking defects.
- materials with a non-porous surface are suitable
- Direct access to the test surface is a prerequisite for the test.
- Sensitivity can be affected by the surface finish and roughness of the body.